Working with tables
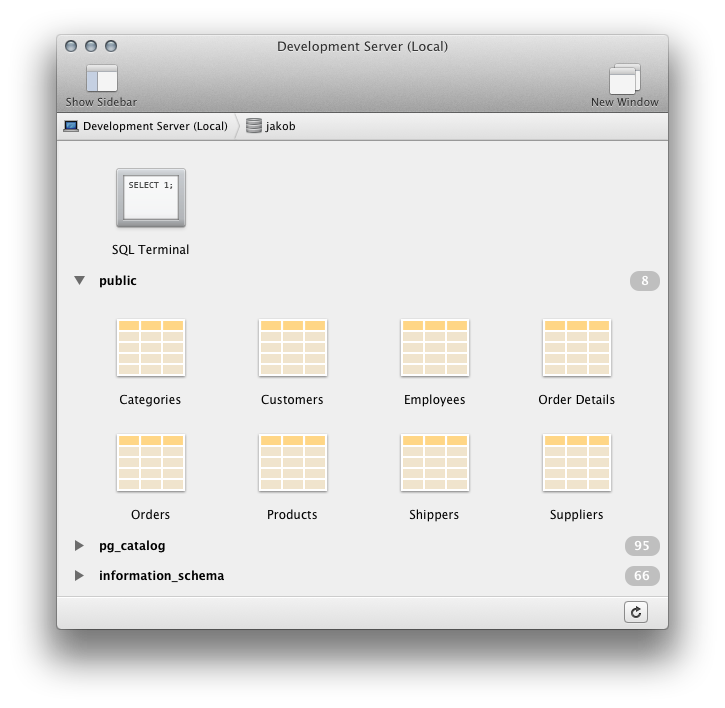
When you first connect to a database, you'll see a window showing all tables in your database, organized by schema. In the screenshot below, there's the default schema “public” containing 8 tables. At the bottom there are the two system schemas, “pg_catalog” and “information_schema” that contain tables and views describing your database.

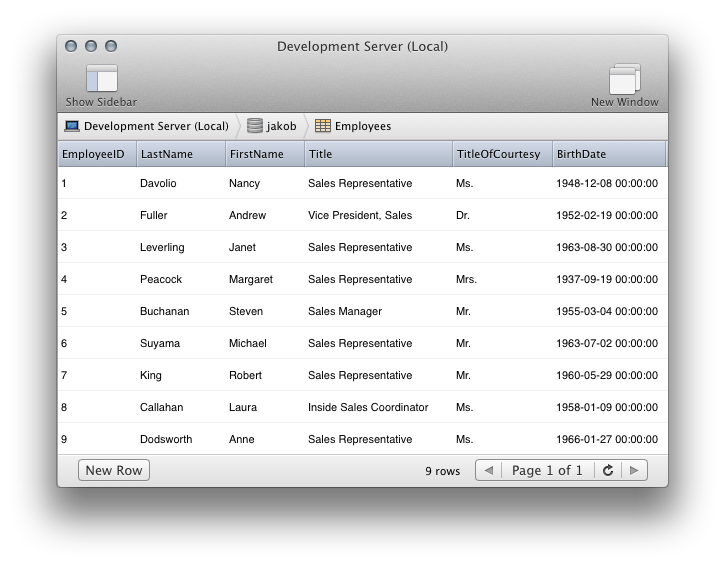
Double click on a table to show its contents, or select it and use the keyboard command ⌘⎇↓. By default, the first 1000 rows in a table are displayed. This table only has 9 rows, so there's only a single page of rows.

Use this view to sort, add and delete records:
- Click column titles to sort the rows, click twice to sort in descending order.
- Click ‘New’ to insert a new row into the table (shortcut ⌘N)
- Click on the circular arrow ⟳ button to refresh the table (shortcut ⌘R)
- To delete a row, either right click on it and select ‘Delete’ from the context menu, or select it and use the shortcut ⌘⌫. You can confirm the dialog with the keyboard command ⌘⌫.
- To edit a row, double click it, or use the keyboard command ⌘⎇↓.
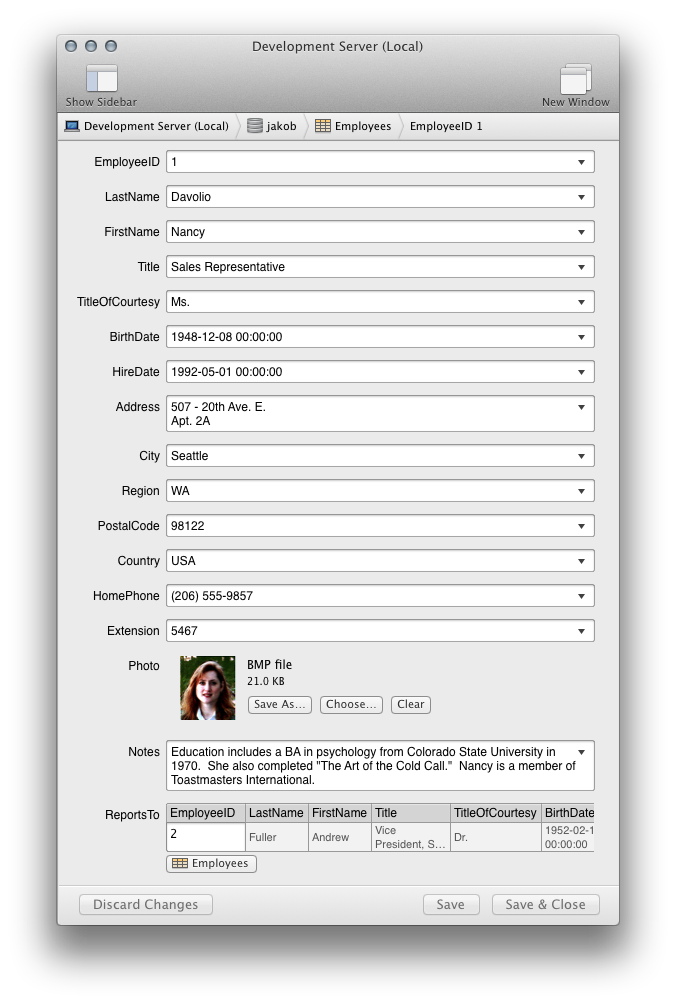
When you double click a row, a form like the following will open:

The form provides large text fields for every column in your database. The text fields automatically grow to accomodate multi-line input. The disclosure triangle on the right of every field allows you to input special values like ‘NULL’ or ‘DEFAULT’.
The ‘Photo’ column above is a ‘BYTEA’ column. PG Commander detects that it contains a picture file and shows a preview.
Last but not least, PG Commander also provides a special interface for columns with a FOREIGN KEY constraint. The last column, ‘ReportsTo’ is such a column. The referenced row from the foreign table is displayed for reference. You can change a foreign key field either by directly typing into it, or by clicking the button and choosing a row from the foreign table.
